Instant Engagement: Eliminate response lag by triggering a WhatsApp message the exact moment a user hits "Submit" on your Elementor form.
Seamless Webhook Integration: No complex coding is required; simply copy your BotSailor Webhook URL into Elementor’s "Actions After Submit" settings.
Dynamic Personalization: Use variables(like {{name}} or {{product}}) to ensure every automated message feels human and tailored to the user’s specific inquiry.
Approved Messaging: Leverage WhatsApp’s Cloud API via BotSailor to ensure your automated templates are compliant and land in the "Primary" inbox every time.
Want to trigger a WhatsApp message whenever someone fills in a form on your Elementor-built WordPress site? This guide walks you through the process in BotSailor. It lets you capture form details and send a personalized WhatsApp message to leads, gather feedback or handle inquiries quickly.
Why It’s Valuable
In 2025, responding fast matters more than ever. WhatsApp’s massive popularity and high open rates make it perfect for direct, instant contact. Setting this up saves time and ensures you never miss a submission.
What’s New in 2025
This guide reflects the latest updates in Elementor, BotSailor, and WhatsApp’s Business API, including smoother webhook setup and quicker message template approvals.
How to Prepare:
Ensure You have:
- Your WordPress site has Elementor Pro (2025) installed.
- Setup a BotSailor account using the accepted BotSailor Business API.
- You have admin access to your WordPress site.
- Knowledge of basic WordPress, Elementor, and BotSailor.
Creating a Message Template in BotSailor
Why Templates Are Important?
WhatsApp requires pre-approved templates for automated messages to meet its rules. These templates let you customize messages with details like the submitter’s name or their input.
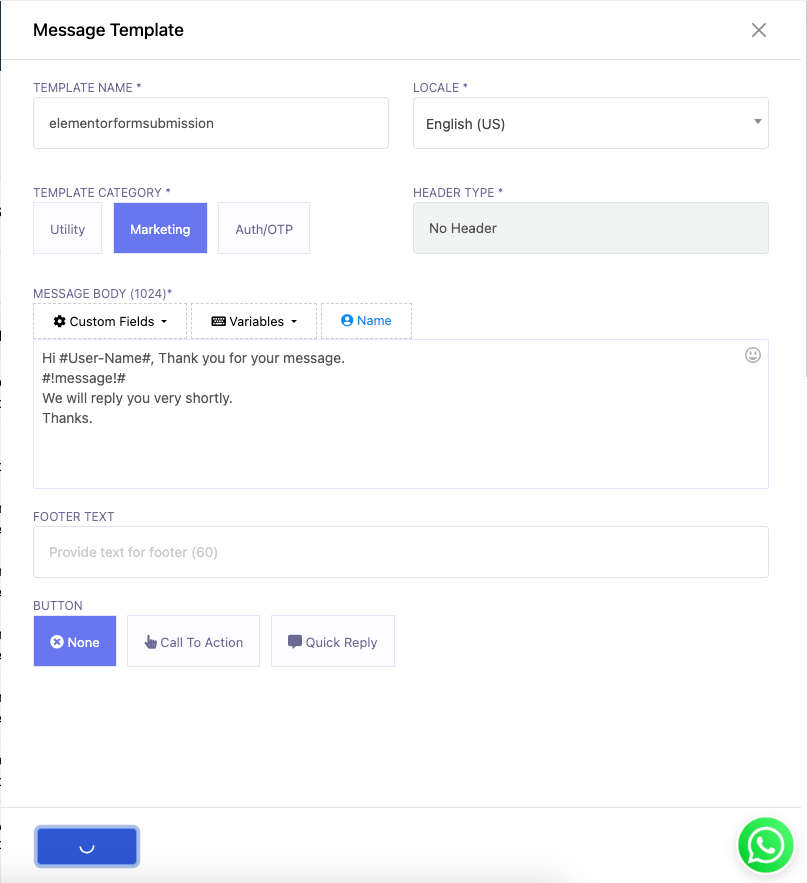
Steps to Create a Template
Access your BotSailor dashboard.
Go to Message Templates.
Choose a New Template.
Write your message
Add variables as needed.
Send the template to WhatsApp for approval (approval times may vary).
Quick Tips
Keep it short and simple.
Stick to WhatsApp’s rules to speed up approval.
Add variables to make messages personal.
Setting Up a Webhook Workflow in BotSailor
A webhook links Elementor to BotSailor. When someone submits a form, Elementor sends the data to BotSailor’s webhook URL, which then triggers the WhatsApp message.
How to Set It Up
In BotSailor, locate Webhook Workflow in the sidebar.
Click Create to start a new workflow.
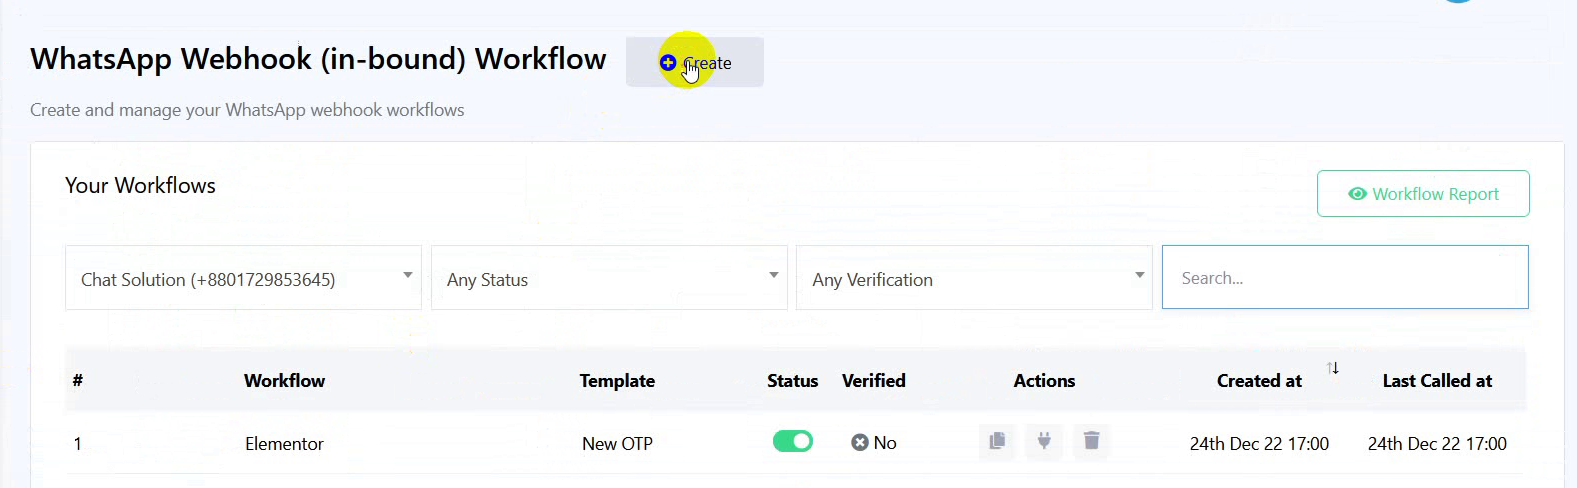
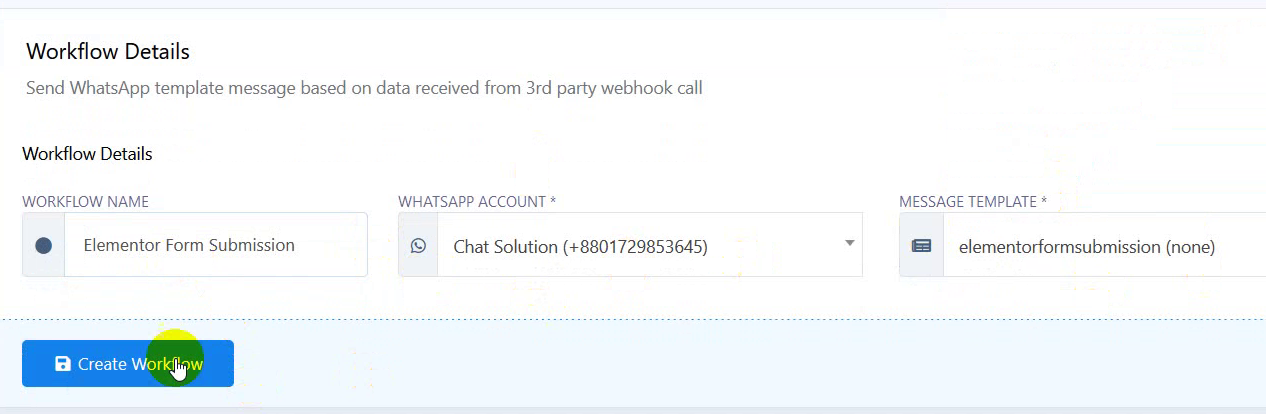
Give it a name, like "Elementor Form Submission".
Pick your linked WhatsApp account.
Select the approved message template.
Hit Create Workflow to get a unique Webhook URL.
Copy this URL—you’ll need it for Elementor.

BotSailor now offers sharper webhook triggers and live stats to track your workflow easily.
Connecting the Webhook to Your Elementor Form
Building the Form of elementor
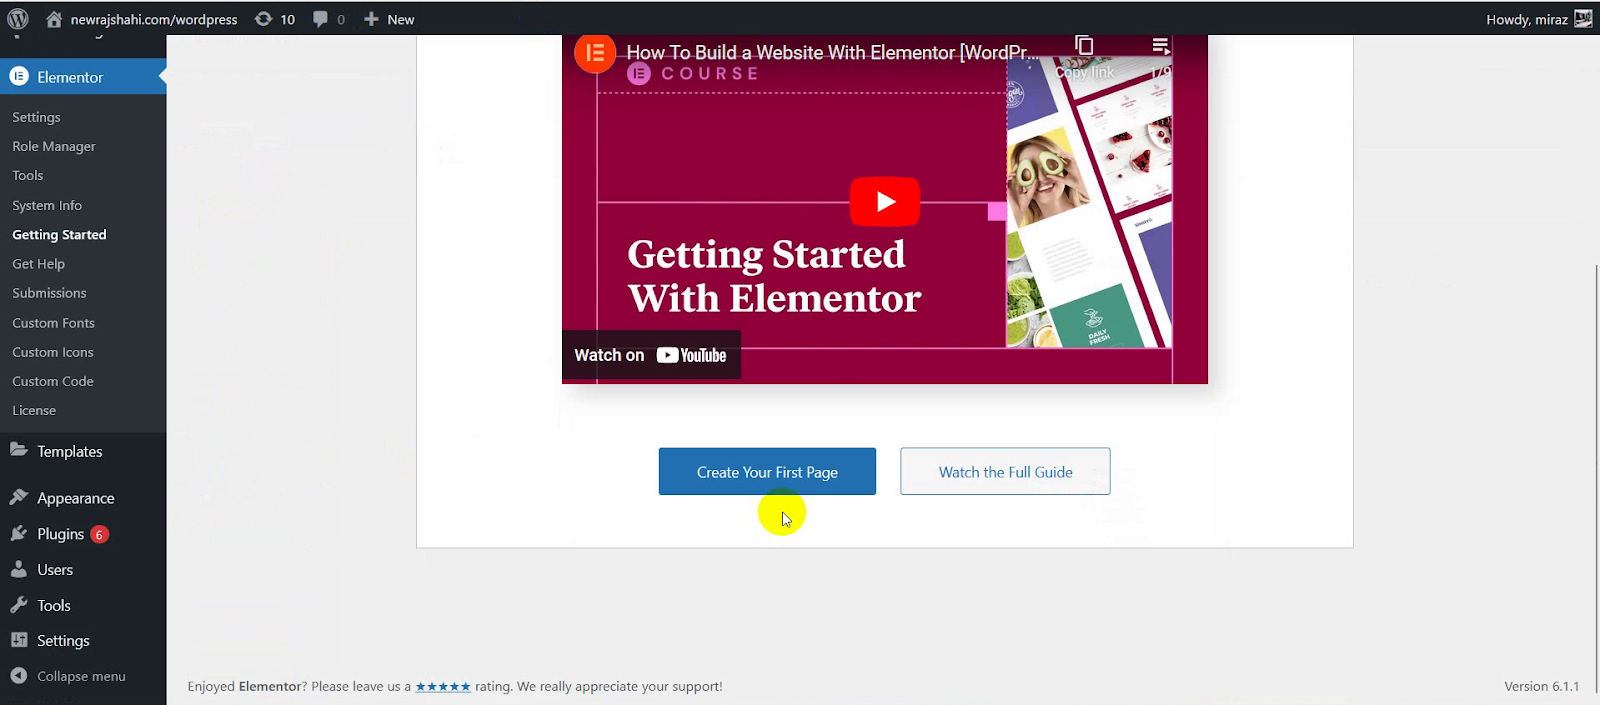
Access your WordPress admin dashboard.
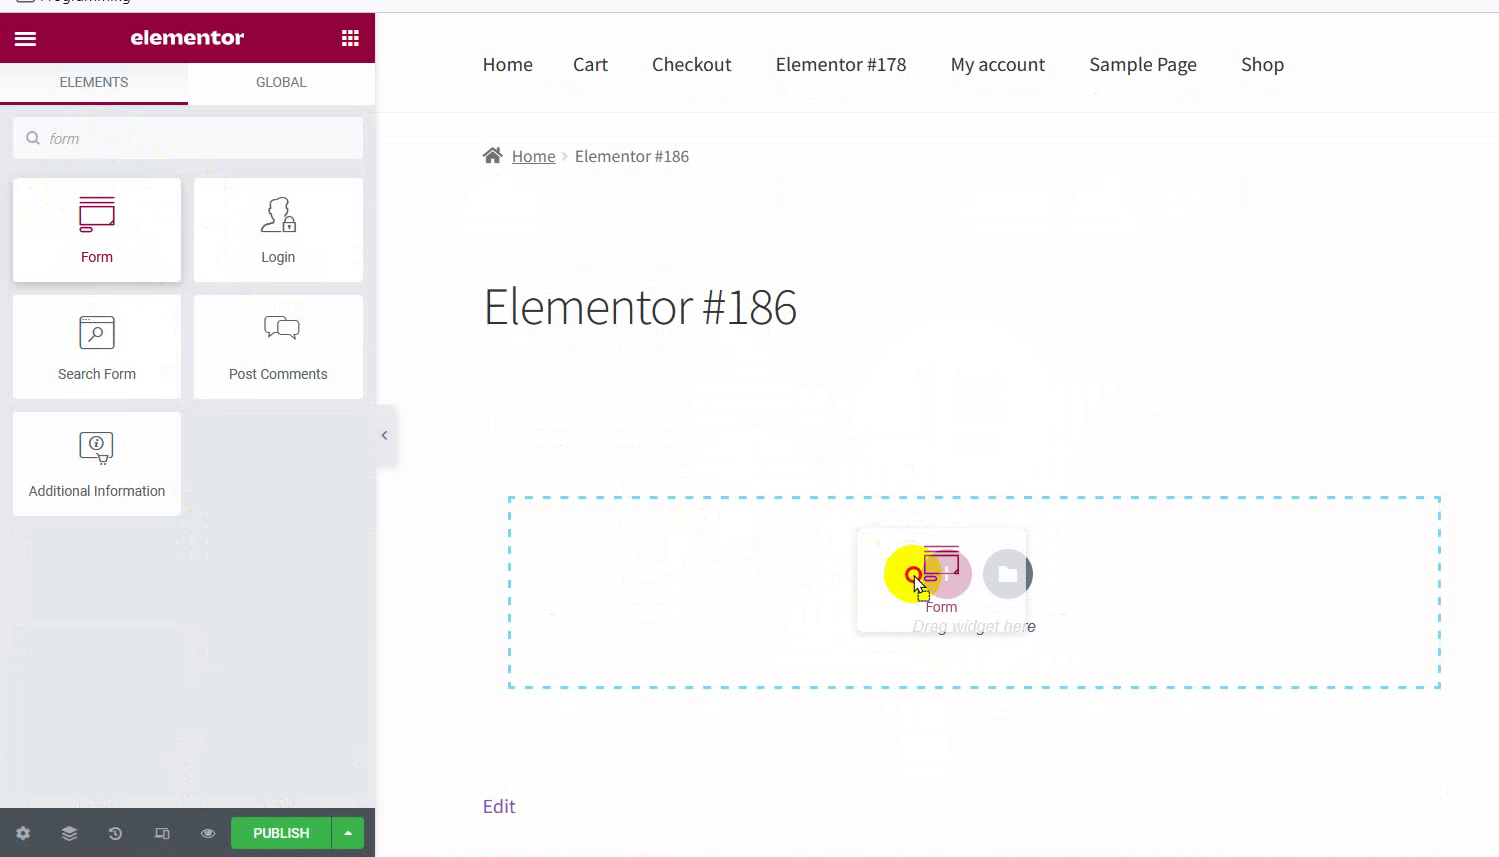
Launch Elementor & create a new page.
Drag the Form widget onto the page.
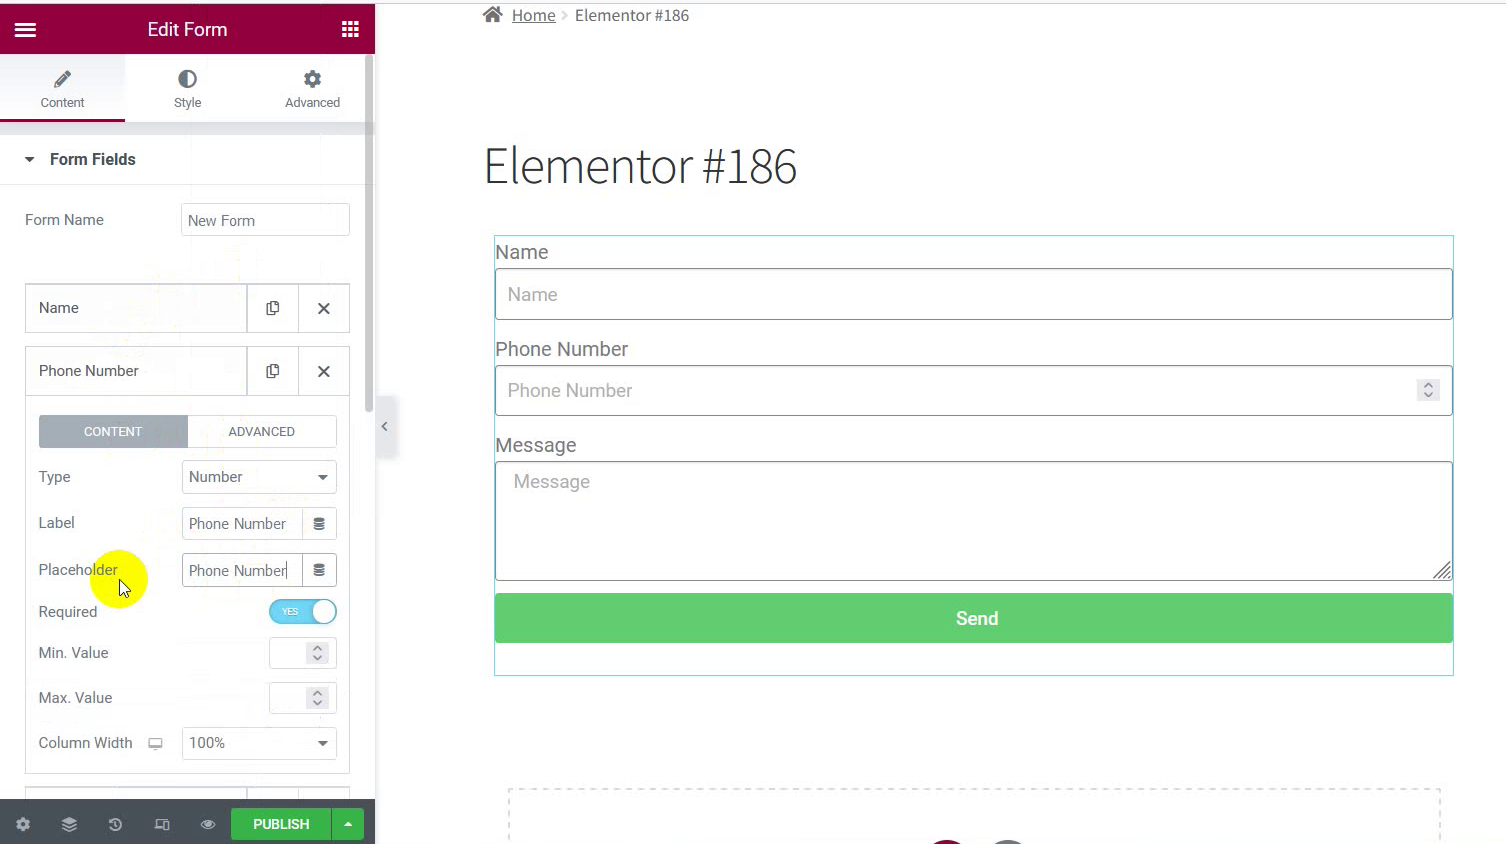
Edit the predefined fields (Name, Email, Message): Change the Email field to a Phone Number field. Set the field type to real. Then change the label and placeholder to "Phone Number."
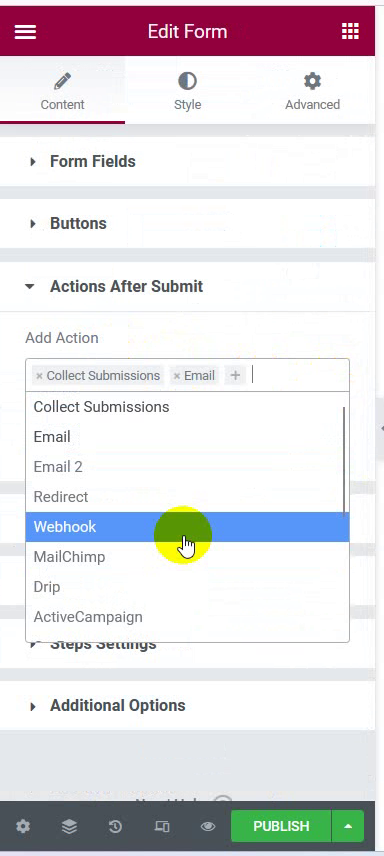
Add the action "After Submit" in the form settings.
Select Webhook and Add Action.
Copy and paste the BotSailor Webhook URL in the box.
Click Publish to make the form live.

Elementor overview
The latest version of Elementor lets you send test data directly from the editor - speeding up setup.
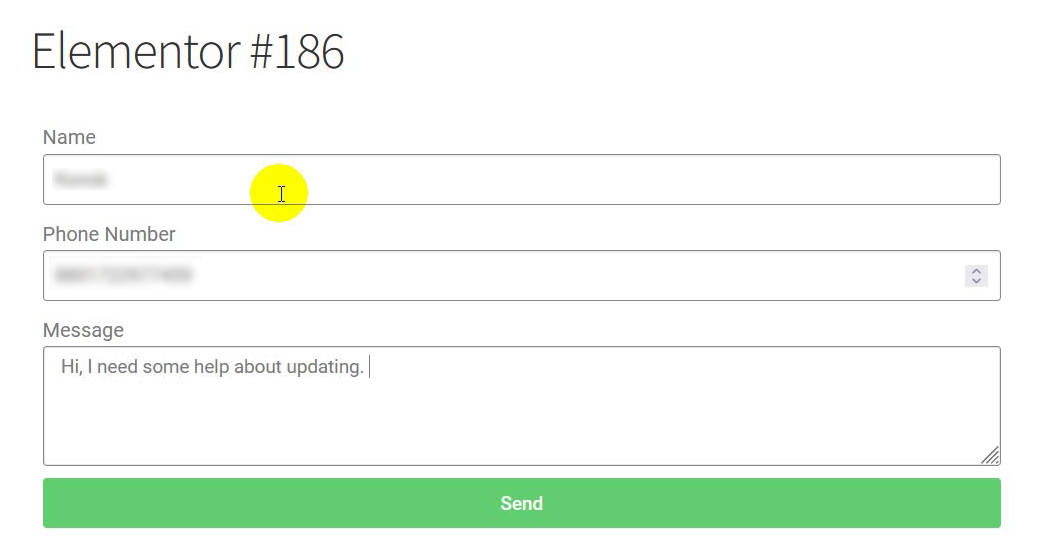
First, test your setup. Complete the sample info form:
Name: Your name.
Phone Number: You're calling (international number: + 1234567890).
Message: A test note.
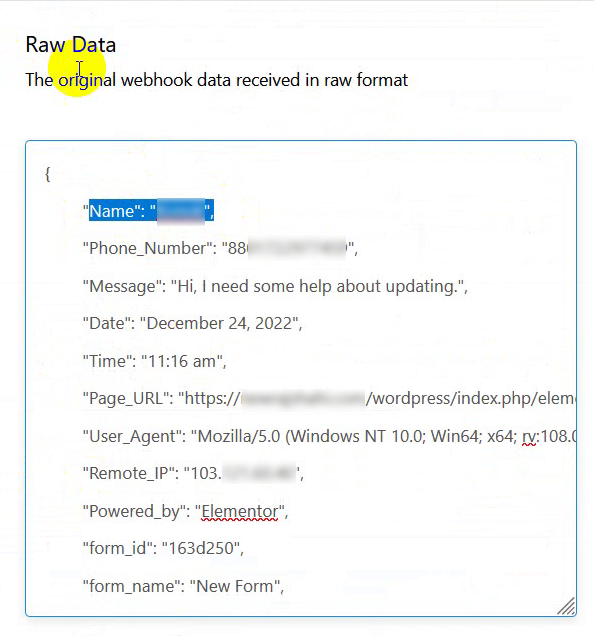
Open BotSailor and click Capture Webhook Response.
Hit Submit and BotSailor will grab the data.
Matching Fields: Connect captured data to your template variables on BotSailor:
Phone Number → {{phone}}
Name → {{name}}
Message → {{message}}
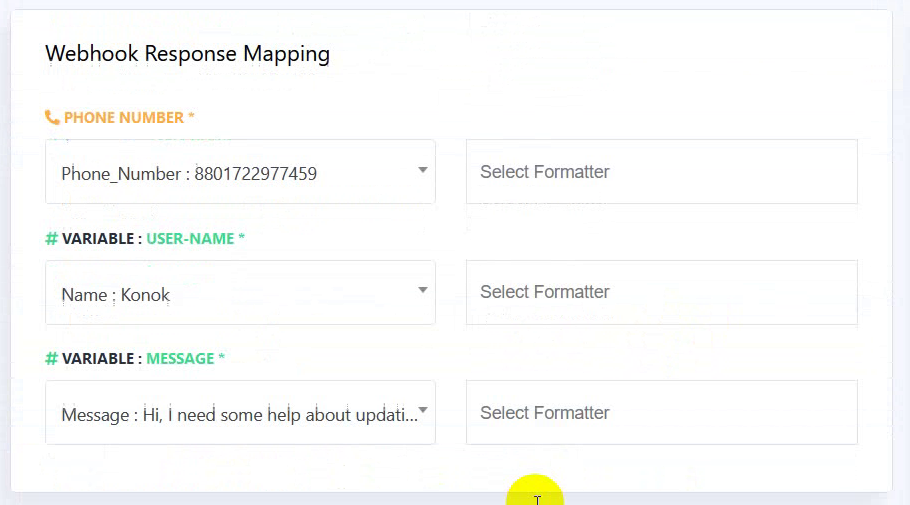
Click Save Workflow.
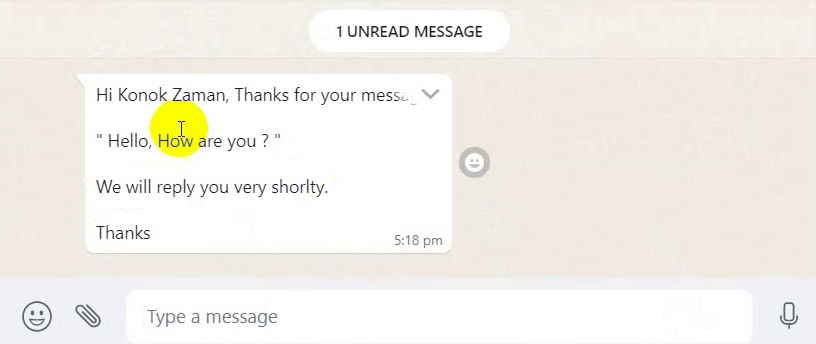
Checking It Works: Look at your WhatsApp for the message. In BotSailor, ensure the workflow status says "Completed".
Extra Options (Optional)
Take your setup further with these ideas:
More Fields:Add options like email or specific questions and include them in the message.
Customization:Retrieve automatically, “Hello {{name}}, our response will be in your inbox shortly.”
More Features:Check the 2025 roadmap that includes sending ‘different’ messages based on form responses. Other things too.
Troubleshooting
Problem Solving the ongoing recurring challenges that continuously bother users:
Form Issue:Kindly retry using the Webhook URL. Also ensure that the form is properly published.
Messages Not Sending:Ensure that your WhatsApp API is active on BotSailor.
Check that the template has indeed been approved.
Field Mix-Ups:Ensure form fields match BotSailor variables exactly (e.g., {{name}}, not {{Name}}).
Phone Number Issues:Use international format (e.g., +1234567890) with no spaces or symbols.
Tips for Success in 2025
Get the most out of your setup with these pointers:
Follow Rules:Keep up with WhatsApp’s messaging policies.
Keep It Simple:Make messages short and useful.
Protect Data:Use 2025 privacy guidelines in your form and BotSailor setup.
Wrapping Up
Quick Review
You’ve learned how to:
Make a WhatsApp template in BotSailor.
Build a webhook workflow.
Link it to an Elementor form.
Test and fix any issues.
Next Steps: Try adding follow-up messages or linking BotSailor to other tools for more efficiency.
Your Thoughts: Have questions or suggestions? Leave a comment below—we’d love to hear from you!
Helpful Links
Video Guide: Watch the tutorial.
Related Articles:
Send WooCommerce Abandoned Cart Recovery Message to WhatsApp by BotSailor
Verify Shopify cash on delivery orders by WhatsApp with BotSailor Webhook Workflow.
How to Send Shopify Order Notifications to WhatsApp by BotSailor Webhook Workflow
Send WooCommerce Order Notifications to WhatsApp by BotSailor Webhook Workflow
Convert WooCommerce COD Order into prepaid order via WhatsApp with BotSailor Webhook Workflow
How to Verify a WooCommerce Cash On Delivery Order by WhatsApp with BotSailor
Automatically Broadcast your New WordPress Blog post to WhatsApp Subscribers with BotSailor
Thanks for following along! Use these steps to send WhatsApp messages automatically from Elementor form submissions. Enjoy automating!