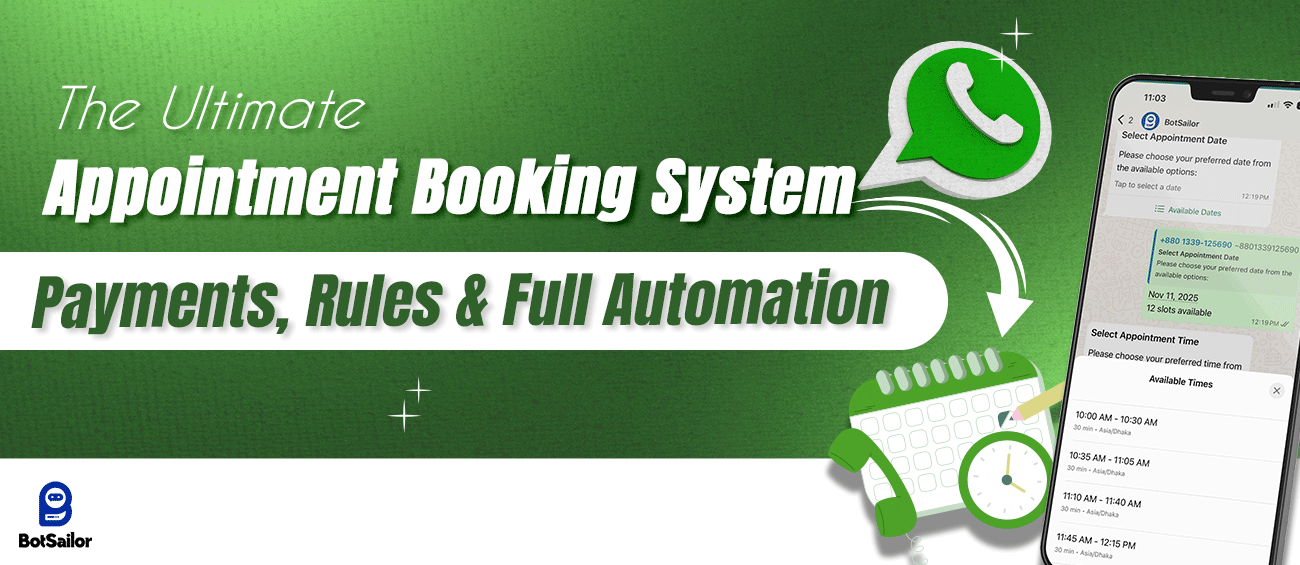
This post is your complete guide to launching the Ultimate Appointment Booking System. We cover A-to-Z setup, including granular scheduling rules, pre-payments, seamless integration with Google Calendar, and advanced data automation from booking appointments to your subscriber manager. Learn how to connect your appointment to your chatbot flow and automate crucial post-booking actions like rescheduling and cancellation for maximum efficiency and control.
Introducing our comprehensive, completely customizable Appointment Booking System, the next step in service management. This groundbreaking feature is made to remove administrative hassles, make your client booking process more professional, and make sure you take advantage of every chance. You can now effortlessly integrate client data, manage your time, and specify your availability with an unmatched level of control and detail—all within one potent tool.Give up manually managing calendars and following up on payments. It's time to employ a system designed to provide clarity and efficiency. Are you prepared to take full control of your schedule and revolutionize your workflow? Without any further delay, let's create an appointment with just a few easy steps.
Let’s Create a High-Value Appointment — The Simple Way

This guide walks you through creating a professional, pre-paid appointment for a 30-Minute Strategy Session, supposedly as a software reseller.
Step 1: Core Configuration and Duration Settings

WhatsApp Account:Click the dropdown menu next to WhatsApp Account and select the specific WhatsApp Business account you want linked to this appointment. This account will be used for sending automated confirmations and reminders.
Google Calendar:Click the dropdown menu next to Google Calendar and select the specific calendar where you want the booked appointments to be automatically added.
Appointment Name:Enter a clear, descriptive name for the appointment (e.g., "30-Minute Discovery Call," "Product Demo Session").
Appointment Location:Specify where the meeting will take place. This could be a physical address, a generic link placeholder (e.g., "Virtual Meeting via Google Meet"), or the name of a meeting room.
Appointment Description:Provide a comprehensive description. Explain what the session is about, who it's for, and what the client can expect to gain.
Add Visual: Click the Choose file button to upload a relevant image. This image will often appear in the client-facing booking interface or associated messages. (Note the specified size limit: 500KB, png/jpg/webp, Square image).
Here, to use the Google Calender,

Step 2: Establish Professional Scheduling- Time, Rules, and Automation
Use the configuration fields to enforce boundaries and protect your time.

- Appointment Duration:Enter the standard length of the appointment in Minutes (e.g., enter 30 for a 30-minute meeting).
- Timezone: Confirm that the timezone displayed is correct for your business. This is essential for preventing scheduling errors with clients in different geographic locations.
- Maximum Daily Appointments:Enter the maximum number of appointments you are willing to take in a single day (e.g., enter 8).
- Break Between Appointments: Enter the buffer time in Minutes that the system must leave between the end of one appointment and the start of the next (e.g., enter 15 to ensure a 15-minute break).
- Maximum Advance Booking:Enter the maximum number of Days into the future a client can schedule an appointment (e.g., enter 90 to restrict bookings to the next 90 days).
- Minimum Advance Booking:Enter the minimum amount of time in Minutes required between the moment of booking and the actual appointment start time (e.g., enter 60 to prevent bookings with less than one hour's notice).
- Minimum Booking Cancellation:Enter the minimum amount of time in Minutes before the appointment that a client is permitted to cancel (e.g., enter 240 to enforce a 4-hour cancellation policy).
- Booking Hold Time: Enter the duration in Minutes for which a slot is reserved for a customer while they are completing the checkout form before it is released back to the general public.
- Allow Appointments Slot Overlap:Toggle this ON if you need to allow multiple appointments to be scheduled for the exact same time slot (useful for group sessions or multi-person resources). Default is OFF to prevent double-booking.
- Create Google Meet Link: Toggle this ON to automatically generate a unique Google Meet link for every scheduled appointment.
- Status: Ensure the Status toggle is GREEN (ON) when you are ready to publish and use this appointment configuration.
Step 3: Define Availability- Configuring Time Slots

This is arguably the most powerful part of the scheduling feature—where you define your boundaries! The flexibility to set both daily schedules and specific date exceptions is what makes the system so effective.The Time Slot section allows you to set your regular availability and manage exceptions (holidays, special events, or sudden unavailability). You can use any combination of these options to build your perfect schedule. Here is the professional, step-by-step guide for configuring your Time Slots, covering all available options.
Setting Standard Weekly Availability
Use these options to define your recurring, day-of-the-week schedule.
Define Available Days/Times:
- Click the "Add Slot" button.In the Availability dropdown, select Available Day.
- In the Day of Week dropdown, select the specific day (e.g., Monday).
- Enter the Start Time (HH:MM) and End Time (HH:MM) for that day's working block (e.g., 09:00 to 17:00).
- Tip: If you need a break (e.g., a lunch hour), click "Add Slot" again and enter a new time block for the same day (e.g., Monday from 13:00 to 17:00).
- Click the "Add Slot" button.
- In the Availability dropdown, select Unavailable Day.
- In the Day of Week dropdown, select a day you are never available (e.g., Sunday). The system will block off this day entirely.
Use these options to override your standard weekly schedule for one-time events or holidays.Define Available Dates (One-Time Availability):
- Click the "Add Slot" button.
- In the Availability dropdown, select Available Date.
- In the Specific Date field, enter the date in the format YYYY-MM-DD.
- Enter the Start Time and End Time for that specific date. (This slot will only be available on that one day, overriding any standard schedule rules).
- Click the "Add Slot" button.
- In the Availability dropdown, select Unavailable Date.
- In the Specific Date field, enter the date in the format YYYY-MM-DD (e.g., for a holiday).
- You can leave the time fields blank to block the entire day, or specify a time range (e.g., 09:00 to 12:00) to block only part of a regularly available workday.
Remember that the system prioritizes clarity:
- Available Days/Dates create openings.
- Unavailable Days/Dates create closures and always override available slots if they overlap, ensuring you are never double-booked on an exception date.
Step 4- Checkout and Data Automation

- Appointment Fees (USD): Enter the full total price for the appointment (e.g., enter 150). This is the final cost before tax.
- Pre-Payment Fees (USD): Enter the amount required as a deposit or upfront payment (e.g., enter 50). If the full amount is required upfront, enter the same value as the Appointment Fees. If no payment is required, leave this as 0.
- Next Invoice ID: Input the next sequential invoice number you wish to use (e.g., typically 1 if you are starting new, or the next number in your current sequence). The system will use this to track payments.
- TAX%: Enter the percentage of sales tax or VAT that should be added to the final price (e.g., enter 5 if you charge 5% tax). If no tax applies, leave this as 0.
Data Actions on Confirmation (Automation)
- Store Booking Data in Google Sheet: Click on this field to select the specific Google Sheet where you want the appointment details (client name, date, amount paid, etc.) to be automatically stored upon confirmation.
- Assign Labels:Click in this box to select the Labels that should be automatically assigned to the client's subscriber manager profile when they successfully book this appointment.
- Assign Sequences:Click in this box to select the Sequences (automated follow-up campaigns) that should be immediately triggered for the client after they book (e.g., select Welcome & Prep Email, 24-Hour ReminderThis crucial section ensures every piece of booking data is automatically captured and used to trigger your marketing workflows.
Step 5: Custom Fields Assignments

For each data point listed on the left (e.g., BOOKING ID, CUSTOMER EMAIL, PAID AMOUNT), you must select the corresponding Custom Field you have already created in your subscriber manager's custom field settings. If you do not need this data stored on the contact profile, you can leave the field blank.
Map Core Booking IdentifiersThese fields are essential for tracking the unique nature and status of the appointment.
- STORE 'BOOKING ID' IN CUSTOM FIELD: Select the Custom Field designated for the appointment's main ID number.
- STORE 'BOOKING UNIQUE ID' IN CUSTOM FIELD: Select the field for the unique identifier used across different systems.
- STORE 'BOOKING STATUS' IN CUSTOM FIELD: Select the field that will store the current status (e.g., Confirmed, Cancelled, Pending).
- STORE 'PAID AMOUNT' IN CUSTOM FIELD: Select the field that will store the exact monetary amount the client paid for the appointment.
Ensure basic client information and the specific service name are recorded on the contact profile.
- STORE 'CUSTOMER EMAIL' IN CUSTOM FIELD: Select the field for the client's email address.
- STORE 'CUSTOMER NAME' IN CUSTOM FIELD: Select the field for the client's name.
- STORE 'CUSTOMER COUNTRY' IN CUSTOM FIELD: Select the field for the client's country of origin.
- STORE 'APPOINTMENT NAME' IN CUSTOM FIELD: Select the field that will store the name of the appointment they booked (e.g., "30-Minute Discovery Call").
- STORE 'APPOINTMENT LOCATION' IN CUSTOM FIELD: Select the field that will store the meeting location (e.g., "Zoom Link").
These fields separate the date, time, and combined date/time stamp for flexible use.
- STORE 'APPOINTMENT DATE' IN CUSTOM FIELD: Select the field for the calendar date only.
- STORE 'APPOINTMENT START TIME' IN CUSTOM FIELD: Select the field for the start time only.
- STORE 'APPOINTMENT END TIME' IN CUSTOM FIELD: Select the field for the end time only.
- STORE 'APPOINTMENT START DATETIME' IN CUSTOM FIELD: Select the field for the combined start date and time.
- STORE 'APPOINTMENT END DATETIME' IN CUSTOM FIELD: Select the field for the combined end date and time.
These fields capture the unique links generated by the system for the meeting and calendar integration.
- STORE 'GOOGLE MEET LINK' IN CUSTOM FIELD: Select the field where the auto-generated Google Meet URL will be stored.
- STORE 'GOOGLE CALENDAR EVENT ID' IN CUSTOM FIELD: Select the field that stores the unique ID of the event created in your Google Calendar.
Once all desired fields are mapped, every booking will enrich your contact database, enabling you to build highly targeted segments and launch personalized follow-up campaigns based on the specific service, time, or amount paid.
Customizing Client Messaging and UI Text
The 'Questionnaires' section to ensure the booking UI aligns with your brand.
- Intro Message: Review or customize the welcome text (e.g., "Welcome! Please fill in the following information to proceed with your booking.
- Date Selection: Customize the Header Text (e.g., "Select Appointment Date") and the Error Text to be clear and professional.
- Time Selection: Customize the ASK TEXT (e.g., "Please choose your preferred time from the available options:") to guide the user clearly through the process.
Final Step: Integrating the Appointment into the Bot Flow
After you have completed the Questionnaires and saved the full Appointment Configuration, the final step is to integrate it directly into your chatbot flow, making it active for your users.

- Access Bot Manager: Navigate to the Bot Manager and click Create to start a new flow.
- Define Trigger: In the Start Bot Flow module, set the Bot trigger keywords (e.g., Appointment) and the Keyword matching type (e.g., Exact keyword match).
- Deploy Appointment Element: Drag and drop the Appointment element from the available actions onto the canvas.
- Configure Linkage: Inside the Appointment element, select the specific appointment you just created (e.g., Dentist Appointment) from the dropdown menu.
Once saved, the bot is completely set! Any user who types the trigger keyword will immediately be sent the Appointment element, launching the booking process you configured, and the appointment is ready to go live.
Complete Post-Booking Action Summary:

🔁 Quick Guide: Setting Up the Reschedule Bot Flow
To allow clients to reschedule an appointment via a simple keyword command, you must link the action type to a specific appointment configuration within your bot flow.
Flow Initialization- Start Flow: Create a new flow in the Bot Manager and set the Bot trigger keyword (e.g., Reschedule) to Exact or string keyword match.
- Interactive Reply: Connect the start node to an Interactive message module. This message provides context before the client clicks the button.

The core functionality is defined in the Configure Button settings:
- Button Title: Set the title to the text the client will click (e.g., reschedule).
- Button Generation Method: Set this to Static.
- When the user presses the button: This must be set to System Default Action Button to ensure the click executes a core platform function.
- Action Type: Select Reschedule appointment. This is the key setting that triggers the rescheduling interface.
- Select Appointment: Choose the specific appointment configuration (e.g., Dentist Appointment) that the button should reset.

This setup ensures that any client using the trigger keyword will be taken directly to the scheduling interface for the correct service, allowing them to choose a new time.
The setup process for the Booking Cancel button is exactly the same, with one difference: there is a button for Cancel appointment in the Action Type dropdown—just select this and it will set the cancellation function.
Conclusion: Take Control of Your Time and Growth
The Ultimate Appointment Booking System is more than just a scheduling tool—it’s a powerful piece of automation infrastructure designed for serious service professionals, software resellers & so on. By giving you granular control over availability, payment terms, and post-booking data flow, this feature eliminates administrative friction and allows you to focus on high-value client work.
You have now successfully configured every element, from setting the initial duration and payment terms to integrating the action directly into your chatbot flow. This level of automation ensures a professional, seamless experience for every client, every time. It's time to put this powerful system to work. Log in, create your appointment, and start booking smarter, not harder.
▶️ Watch the Video Tutorial
For a complete visual walkthrough of the entire configuration process, including the Bot Flow setup:
Frequently Asked Questions
Find answers to common questions about this topic
Yes, it is highly recommended. Connecting Google Calendar ensures your schedule is automatically blocked out when appointments are booked, preventing double-booking.
Yes. In the Time Slot configuration, simply use the Available Day option multiple times to set different start and end times for each day of the week.
Use the Unavailable Date option in the Time Slot section and specify the exact date (YYYY-MM-DD). This overrides all standard available hours.
Maximum Advance Booking prevents users from booking too far out (e.g., 90 days). Minimum Advance Booking prevents last-minute bookings (e.g., 60 minutes before the start time).
Mapping Custom Fields (e.g., APPOINTMENT DATE, PAID AMOUNT) ensures all appointment-specific data is saved directly onto the client's contact profile, enabling you to segment your audience and trigger personalized follow-ups.
You must go to the Bot Manager and set the Appointment element as the action triggered by a specific keyword (e.g., typing "Appointment").
The cancellation will typically be prevented or flagged, adhering to your policy set in the configuration. The client cannot proceed with the automatic cancellation flow.
Go to Appointment Settings, select the name of the appointment from the Appointment List, and click Edit Appointment. Remember to click Save after making changes.
This button instantly reverts all the customized text for your automatic messages (Cancel, Reschedule, Success, etc.) back to the system's original factory default settings.
It specifies how long a time slot is temporarily reserved for a customer while they complete a form or payment on the checkout page before the slot is released back to other users.

Fatema Khatun
Content Author


(0) Comments